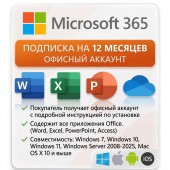
Step 1. Purchasing a License
First of all, make sure you have a Microsoft 365 account.
Step 2. Sign in to your account
After receiving your credentials (login and password), go to the login page:
https://login.microsoftonline.com/.
Enter your login and password in the appropriate fields and click "Next".

Important! For security reasons, activation is no longer supported in outdated versions of Internet Explorer and Edge. Please use the latest versions of Google Chrome, Yandex Browser, Opera, Mozilla Firefox, or any other modern browser.
Step 3. Change temporary password
Upon first login, the system will automatically prompt you to change your temporary password to a permanent one.

- In the first field, enter your current password (the one you received after purchase).
- In the second and third fields, enter a new strong password of your choice.
Pay close attention to this step: save your new password in a secure place to avoid access issues in the future.
Step 4. Install desktop applications
- Download the distribution suitable for your operating system (Windows or Mac).
- Run the installation and wait for the process to complete.
Step 5. Sign in to the installed application
After the Microsoft 365 Pro Plus installation is complete, open any application from the suite, for example, Microsoft Word. In the authorization window, enter your login (the email address you purchased) and the password you created in Step 3.
Step 6. Check activation status
To verify that activation was successful and your subscription is active, follow these steps:
- Open the "File" menu in the top left corner of the program.
- Go to the "Account" section.
- Look at the product information on the right. If you see "Microsoft Office 365 subscription product", it means the installation and activation were completed successfully. You can now use all the features of the office suite.